"Animatrics"(one approach to 3d animation)
Hi!
Are you new to CG animation, or confused about your workflow? Not sure where and how to start animating and to determine an end point where you could call your animation finished? Have a look at my new Animomania Workflow Tutorial, where I'll take you through a simple scene I created. Hope this helps some of you! :)
-AHowdy guys!Here, I'm going to share my workflow with you all and I'll take you through a simple scene.
I'm learning this craft we call animation, and I'm trying hard to achieve better results every time. By any means, I'm NOT an expert on any of this, so please bear with me! I still have A LOT to learn!!If it doesn't help you at all, or if its disturbing your mental peace, or giving you a headache, or if you feel like vomiting after reading this... just FORGET it!.... Throw it out of your brain! And remember that, this is how I like to work. It MAY or MAY NOT help you! Maybe you have something better, that helps YOU create better stuff!Anyhow, I would love to share my workflow with you all in a hope that it helps you somewhere, somehow.....ummmm maybe...I dunno! heh..
Few basics
Key Poses:Key poses or the storytelling poses define the character, the emotion, the feeling of the moment, the energy, and the performance. These poses or drawings are the soul of your scene, or they are the bedrock to your scene.
Primary Breakdowns:Primary breakdowns define three major elements of motion....1) Favoring (what is favoring?? Oh! You're not sure about it? Go ahead and read Keith's "Do Me A Favor" tutorial....awesome stuff!)
2) Overlap and Drag (Wanna learn more about them in a detail? Read Keith's "Breakdowns Can Be Such a Drag" overlaping motion article.
3) Arcs (Do NOT ignore them! They are really improtant to create a good looking animation....)
Secondary Breakdowns:Secondary breakdowns help you define the motion even more. When a primary breakdown is not enough for the computer to interpolate properly, you add a secondary breakdown, kinda like fill in the blanks, to further define the motion. It helps to define eases, additional overlap, micro anticipations, additional arc definition, overshoot, settle, etc...
Close your eyes and ANIMATE..
(thinking/planning and drawing...):
Okay, you can now close your eyes and imagine your scene..... Just imagine your character in action... and try to see the scene already done. Visualize what the core of the scene is.Also, you may wanna create and/or find reference, act the scene out....make thumbnails and share your ideas with others. This step is really improtant! So, don't skip it! The more you plan, the better your results will be. Most of the times I act out the scene and I video tape myself for reference. Its really helpful to get the dynamics of the motion. However, be careful when using references. Don't simply copy it. Look for ways to exaggerate or push your pose to increase its entertainment value.
Posing in 3D/Blocking the scene:
I like to spend some good amount of time in posing my character. Interesting poses are extremely important for effective and natural-looking animation. When posing your character, pay close attention to anatomy (understand the underlying structure) and non cliched "appealing" poses. Watch out for center-of-gravity placement and off-balance problems, as well as twinning or symmetrical poses.
Getting into the technicalities of CG and realizing the workflow (Yo! Maya...ol' buddy ol' pal...I don't want your free in-betweens right now! Thanks for asking!......I'll ask you later, when I need them....):
Pre-blocking:I like to work and think the traditional way, and my brain tends to work much like a 2D animator. I don't know why, but thats how I am right now! I believe this helps me to think properly and I always feel more organized. So, when I open up my favorite CG software, Maya, I want Maya to work and behave like a 2D animation software. And when I'm posing my character (making 3d drawings), I want Maya to give me JUST the pretty drawings that I create in there. I like to call them "drawings", as Maya is doing nothing but creating a bunch of 2D drawings. After all, everything on the screen is 2D (flat) and they are nothing but drawings! Drawings with realistic looking shades give a sense of depth. We're just using a CG software to create those drawings instead of a pencil!!So, I make drawings in/with Maya (my high-tech pencil) and I don't want it to give me all the IN-BETWEEN drawings at this time. In-betweens are mostly used for making the motion smooth and it helps to get rid of that "blocky" feel. And a computer is really great in making straight and well calculated in-betweens and getting rid of that "blocky feel"!
Now, if you make a drawing on Frame 1, and another on Frame 5, in Linear Tangents (interpolation without eases), Maya will simply create straight in-between drawings on frame 2, 3, and 4. In the early days (2D era), lead animators did all the key drawings and the breakdowns and the in-betweeners had a job to make nice and intelligent in-between drawings (as far as I know). Yes, they did everything intelligently! And thats what Maya/computers cannot do! So, Maya is just like your DUMB in-betweener friend....Its really dumb! If you create a drawing "A" on frame 1 and another drawing "C" on frame 3... Maya will record all the data (the attribute values and stuff) from drawing "A" and drawing "C" and find the their middle values and make one middle drawing "B" on frame 2. Maya is really good in doing all this, and its not always bad! Sometimes it really helps, like when creating breakdowns. I'll discuss this in a short while.
Before I start posing my character in Maya, I make sure that it's Default In-tangent is set to "clamped" and its Default Out-tangent is set to "stepped". Now Maya will not create in-betweens or interpolate between frames. And I'm all set to start blocking my scene.
Blocking:I usually like to start making my poses on consecutive frames 1, 2, 3, 4, 5,......... I just don't care about timing at this stage. I just like to concentrate on my poses. Most of the time, I like to work pose to pose and after I finish all my key poses, I work on my primary breakdowns.


Art of making the breakdowns or transition drawings:Breakdowns are really improtant! This is what defines HOW you're getting from a point to another or how you're transitioning between the poses. They are the best way to take control of the in-betweens and to prevent a computery look. Breakdowns also define emotion and the intent behind a motion.I usually don't like to make breakdowns from scratch unless I've to make a wild one. If I make a breakdown from scratch, I might not get a smooth transition. So, I use Justin Barret's "TweenMachine" tool to build my breakdowns. TweenMachine allows me to quickly build my basic breakdowns and in that, I can easily decide its favoring, and then I manually work on them to make them look more interesting or wild, if needed! However, you may not be using these scripts in a production environment. So there is one easy method I've learned from Keith. I just convert the key poses into linear and move them about 4 to 5 frames apart. This will allow me to find one middle position between the key poses and I can easily set its favoring.So, when I start building my primary breakdowns, I work on the arcs, favoring, overlap and drag. If I make something cartoony, my breakdowns could be really wild! I may even break the rig in my breakdown to create a desired effect. Breakdowns are also called transition drawings/fames, and these drawings stay up there on the screen for just a fraction of a second. So you don't really see them...you feel them! Sometimes I may go really wild with my breakdowns but I'll make sure that its fitting the motion well, its not distracting and its helping me to create a desired effect.I use a dry erase marker or erasable marker to make dots and track my arcs directly by drawing on the computer screen. Arcs are really important. If you don't work on your arc, the motion may not look believable or natural. So, its really improtant to work on your arcs at the time of creating primary breakdowns.
Creating breakdowns are really fun and at the same time difficult! It tells the computer HOW to move from a drawing to another and you really squeeze everything out of a pose and then into a pose. This is where you let your imagination fly high and you create some really cool breakdowns and create something interesting and cartoony. In fact this is the phase where you create that cartoony/snappy feel. If you're looking for ways to create cartoony motion, you'll have to make proper breakdowns to achieve that kinda result. You don't create a snappy movement by moving things too rapidly in space. You'll have to create proper anticipation, overshoot (depending on your motion) and settle breakdowns to create a sense of snappiness in your motion and make it believable. Otherwise, the motion will look poppy and ugly. So, try hard to make smart breakdowns!
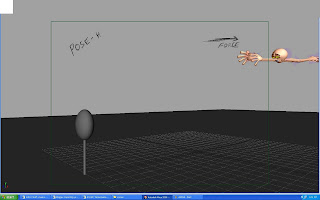
thi is how it goes to the end (h_pose) exit

More definition with Secondary breakdowns and some "boundary walls":
Now start filling the blanks and the dead spaces! This is the period where your blocking starts looking like full animation. You define almost EVERYTHING here! You start to define all the eases, additional overlap/drag, micro anticipations, additional arc definition, overshoot, settle, etc... And this is the period where you add those subtle moves which brings all the life into everything. You start fleshing out your animation.
in the above pose we could clearly see that the effort the character is taking to really dive in to the poses this is called the anticipation for the anticipation its kinda manouvering the comp guy to force to get rid of dat inbetweens...
Timing (the King!):
Once I'm done with my key poses and secondary breakdowns, I've used GreasePencil to roughly time my animation, and then I manually moved all the keyframes to match its timing.Always remember to play with your timing! A good timing comes from experiment and experience!! The more you play with it, the better your results will turn out. And this is where MonkeyJam or Grease Pencil help me a lot. They allow me to play with my timing, quickly and efficiently.So, I timed all my drawings....and this is what I got
My last step in "stepped mode":
There is one more thing I like to add just after making all the secondary breakdowns, and thats something I like to call 'boundary walls". These are just keyframes you create to make a hold.For example, if you have a drawing "A" on frame 1 and another drawing "B" on frame 6. And you want to HOLD drawing A for 3 frames and then transition from drawing A to B. To do all that, you might wanna make one copy of drawing A on frame 4. In stepped tangents (Maya), just press the "S" key on frame 4 and you'll get a copy of drawing A on frame 4. Easy! Now Maya will hold drawing A till frame 4 and then transition to drawing B from frame 4 to frame 6.Now, what will happen if you don't make a copy of drawing A on frame 4? Maya will add straight in-betweens between frames 1 and 6, or it will interpolate directly from frame 1 to 6. You're simply letting the computer animate! It'll look plain UGLY, unless you're intentionally doing that for something. I like to make all these in stepped tangents, and now my animation and its timing are safe behind these "boundary walls"!! Yippppeeee!!!!
Final blocking (in stepped tangents):This is the final version of my blocking (still in stepped tangents). Now it kinda looks like a 2d animation without in-betweens!
Converting into linear and starting to clean-up; Me: Hey dude... Maya! I want your in-betweens now! teeheeee... MAYA: YOU NUMSKULL! I offered you my cool in-betweens a long time ago, but you were acting too smart and declined my humble offer!! Oh well, here you go.... Me: Ummm....errrrr....errrr..errrr....okay!
I start cleaning up my animation as soon as I convert into linear tangents. Yes, clean-up!! You can't get away from clean up in CG..... And cleanup takes forever! Few months back, I remember I made one animation for a forum competition, and it turned out to be a crap! WHY???? Because I didn't clean it up the way I should have! The result was really poor, OOOHH!! (crying!!)..... You know, it really makes me CRINGE! So you can't get away with clean-up in CG, and thats what a lot of noob animators do as they're not sure of the importance of proper clean up! And no doubt I was one of them! heh....
Kill that ugly bump!!.....but wait! It could be your friend!: Now, how to clean up? Well first off, when I convert into linear, I double and triple check all the in-betweens and I make sure that there are ABSOLUTELY NO unwanted in-betweens! And then I recheck all my arcs and make sure that everything is working the way I want them to be. After doing all this, I select my pelvis control (because thats where all/most of the motion starts) and open up the graph editor (the beautiful spaghetti box!) and I then I start to clean up its each and every attribute. Then I move up the spine, neck, head, shoulders, arms, legs and clean them all up.Well, you may ask....." How do I do all that, and what the hell should I do in the graph editor...whats the objective of it? And what should I look for?" Well, you try to make those graph look pretty, BUT.......not at the cost of your animation and drawings! Never ever play with your graph editor BLINDLY! This could really hurt your animation! So, open up the graph editor and make sure you can see the view port clearly enough and figure out how moving a keyframe in the graph editor affects your pose/animation and its feel.So, I may not change something because I believe in my drawings and I'll cross check before moving any keyframe around. I select my keyframe and move it UP and DOWN. Don't move it horizontally or you'll change the timing! There could be spots which may look ugly, but don't change that just to make your graph look smooth or flowing. There could be bumps in your graph, and there could be some reason for that. Find out, why is that place bumpy and whats making it bumpy. Open up the graph editor so that you can see it as well as the render camera viewport. And try moving that keyframe UP and DOWN. Now OBSERVE! What in the world is it doing?? Can you change it and get rid of that ugly bump? If that bump is good for nothing, or if you think that changing that will not degrade your animation/drawing, then go ahead and make it smooth! You can see a bump over here in the picture below, and I don't wanna mess with that. I've already discovered that its there for a very good reason. So, I'm not changing that. That bump is NOT my enemy, its my friend! Its making my animation the way I want it to be. Its giving it a flavor that I like! So, I'll keep it. I'll also make sure in the graph editor, that all my slow- ins and outs are working properly, and also I'll keep an eye on those moving holds! If I need a moving hold somewhere, I may simply move a keyframe up or down to make that little moving hold to add extra life in my animation. By working in linear mode in the graph editor, you force yourself to carve the motion in the curves. If you don't set breakdowns for your ins and outs, it will be apparent that you're letting the computer animate for you. The linear curve makes your motion look mechanical, and you may have to set more keys to avoid that look.
I made up these equations, try to keep them in mind:
Good animation + Good looking graph = Great!!
Good animation + Ugly graph (Of course, having a good reason to be ugly) = Well, ummmm......Great!
Bad animation + Good looking graph = Bad result! This will not do.
Bad animation + Bad looking graph = This really stinks!!(hellloooo Thanks!!)
It took some time and I cleaned up the graph editor. And after spending hours and hours fixing all the curves in the spaghetti box, this is what I got
Oh yeah! It takes a lot of time to do all this. But you need to do this in CG to make your stuff stand out!
Spliney, slimey.....Yummy! :
After spending hours cleaning up in the linear mode, I convert everything into spline. And I start cleaning up my animation in spline. I've worked hard in the linear-pass clean-up. So, I need not to worry about this spline-pass clean-up.I open up my graph editor, and this time instead of moving those keyframes up and down I'll just adjust their tangents to clean them up. In the linear-pass, I've already made sure where all of my keyframes need to be. So most probably I'll not change their values this time and I'll just work on their tangents to make the graph and the motion look smooth.I may also delete a few extra keys. And that'll be just fine if that doesn't change the graph much. To do that efficiently you may wanna do this:In the graph editor in Maya, right click and and goto View-----> and check "Show Buffer Curves". Now select a keyframe and move it or delete a keyframe. You'll be able to see the original curve behind it! Its really handy when deleting those extra keyframes. Just make sure that deleting a keyframe is not changing the feel and flavor of your animation!
Now, after working hours and hours on graph editor, my curves start to look much better and I've also made sure that nothing is degrading my animation performance. And whatever the step I take, it is ONLY to improve my animation! Now my graph starts to look something like this:
Please note that cleanup takes a lot of time. And its perfectly normal if it takes 20 percent of your time to get up to the point where its cleanup time and the other 80 percent of your time is cleaning up. This cleanup process from linear to spline pass really takes forever! So, don't skip this cleanup part, especially when you have time in your hand! This will really make a lot of difference and help you shot stand out!After cleaning up and pushing some of the poses directly in the graph editor, this is what I got (the final pass in spline)
Ta-daa!
So, everything is working the way you wanted, right? Now ask yourself..... "Is this what I want to see?" If yes, then after all the hard work you're finally ready to render out your animation (if you want)!Final rendered-
Thas all folks, i hope this thing helps you guys in some ways,well if u dont think so? just think that u have wasted couple of minutes in reading my work flow.......
GOOD BYE....
Special Thanks:I would really love to thank these good folks, if it weren't for them I could have never wrote my workflow tutorial....Keith Lango: For his awesome VTS. I've been learning everything from him. If it weren't for you Sir, I would've never even had the slightest idea of what animation really is!
sunny ,nideep,rasheed........these are the guys i got inspired by their works and posted this work flow,thanks to them once again...
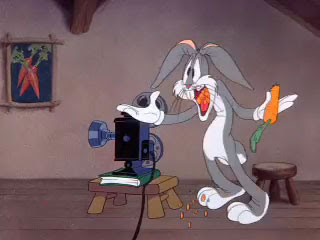
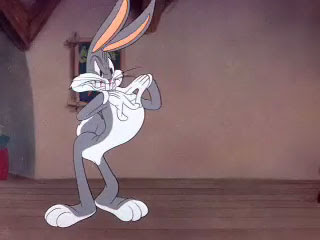
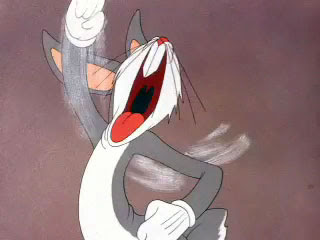
 Over the last few weeks, I’ve been step-framing through my Looney tunes This stuff is a gold mine! You can pick any golden age WB cartoon at random, and learn a ton from it.